From Source
Installing XOA from source gives you all the pro features available.
Create a VM
Section titled “Create a VM”Follow the guide here
Build XOA from source
Section titled “Build XOA from source”For this method, to make it easier, follow first the Quick Deploy method, then come back here.
Navigate to 🏠Home > 🖥️VMs
- Click the
XOAVM (with descriptionsXOA from Source) - Navigate to
Console - Run the following:
# Install gitsudo apt updatesudo apt install git
# Clone the XOA Installergit clone https://github.com/ronivay/XenOrchestraInstallerUpdater.gitcd XenOrchestraInstallerUpdater/
# Copy example config to a new file named xo-install.cfgcp sample.xo-install.cfg xo-install.cfg
# Edit the config file (below you will find my sample)nano xo-install.cfg
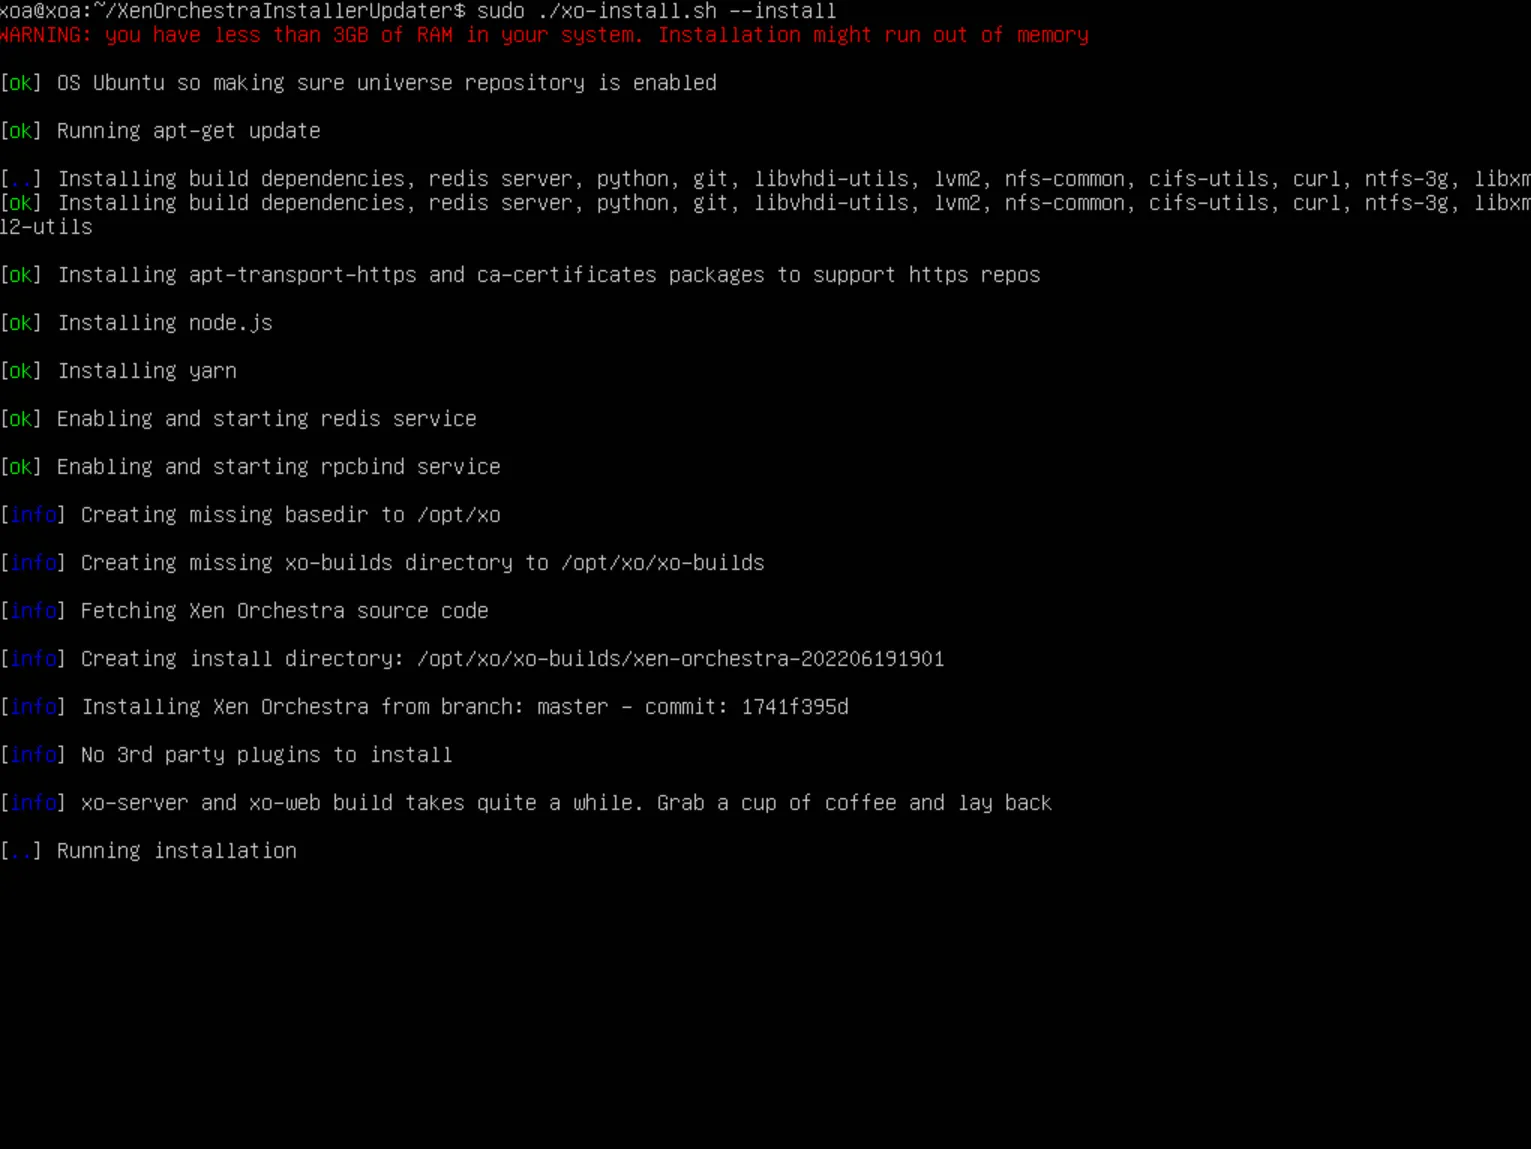
# Run the installation script (This will take a while)sudo ./xo-install.sh --install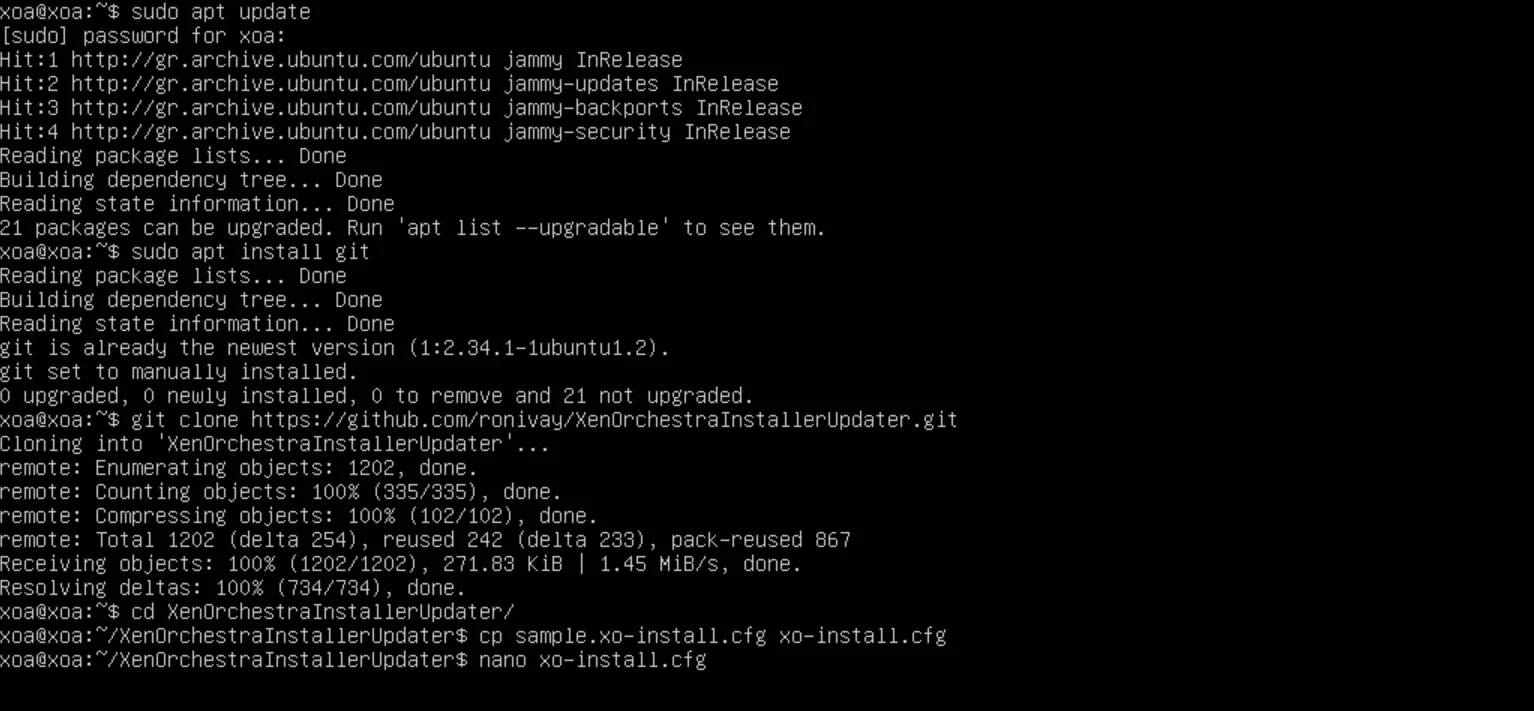
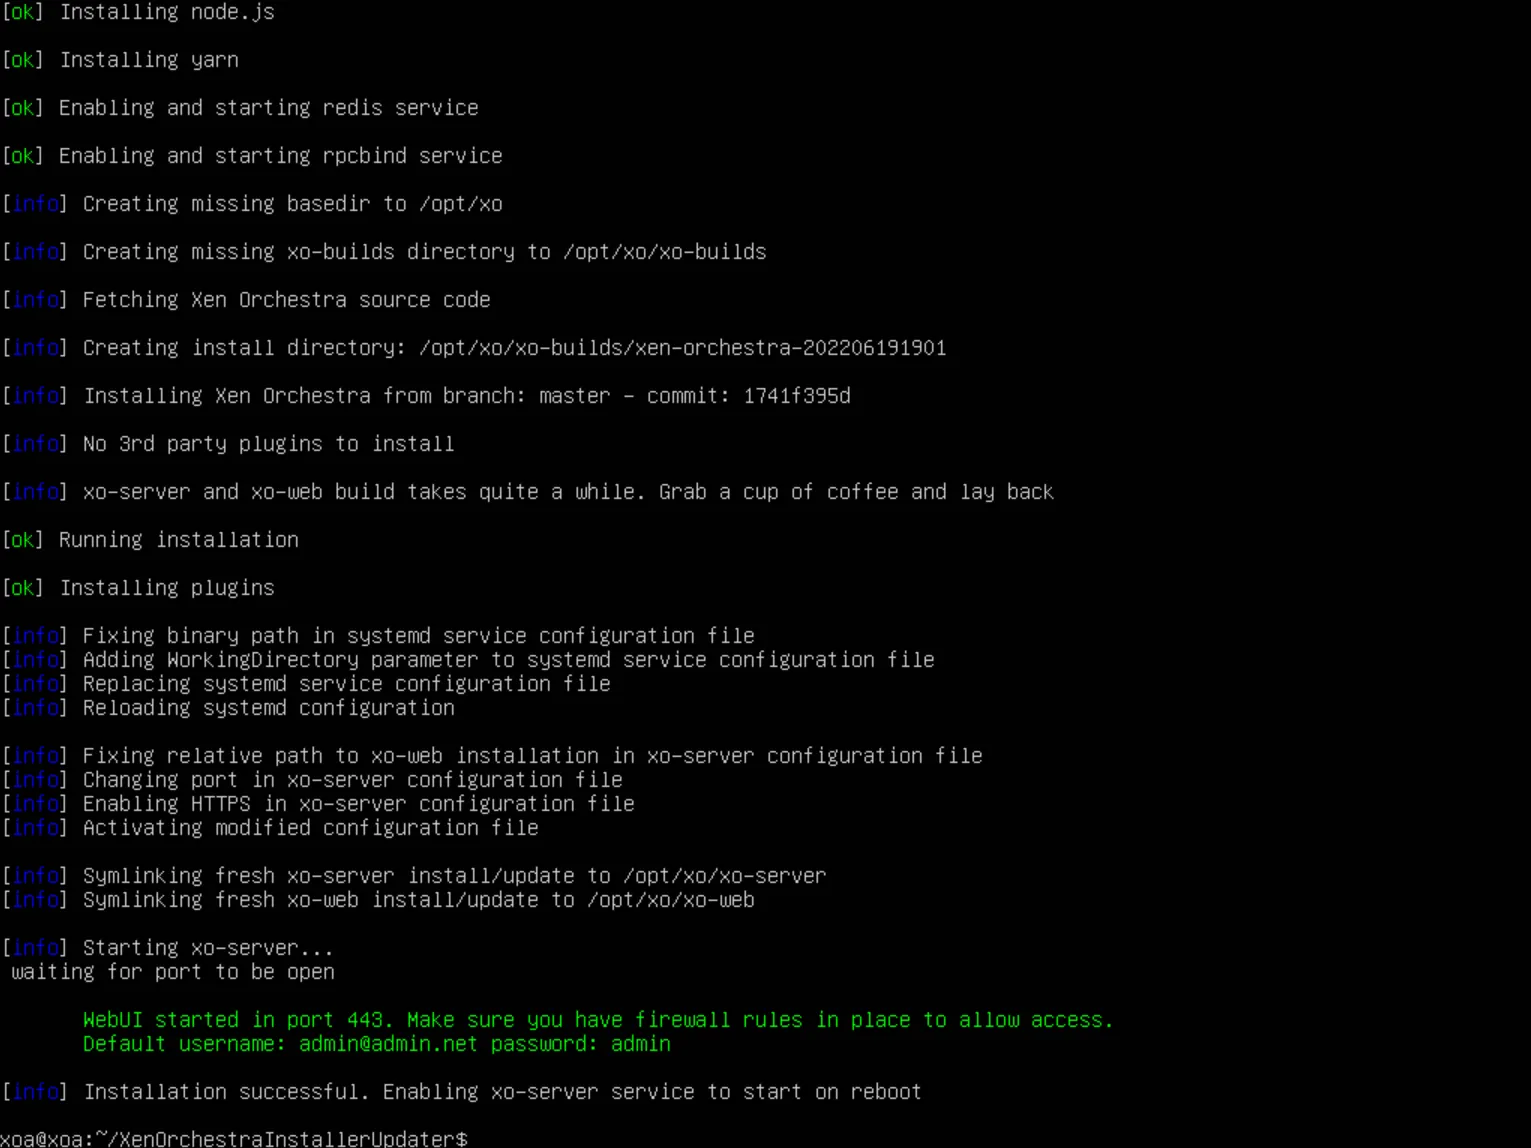
After the installer is finished, visit https://<the.ip.ofyour.vm>
Default credentials are:
- Username:
admin@admin.net - Password:
admin - Follow the Quick Start guide
# Optional user that runs the service# default: root# no effect to Xen Orchestra proxy#XOUSER=
# Optional parameter if running as non privileged user to use sudo when mounting/umounting shares inside Xen Orchestra# no effect if XOUSER is root# options true/false# no effect to Xen Orchestra proxy#USESUDO=false
# Optional parameter to generate sudoers config when missing completely if USESUDO is set to true# no effect if XOUSER is root# options true/false# no effect to Xen Orchestra proxy#GENSUDO=false
# Port number where xen-orchestra service is bound# no effect to Xen Orchestra proxyPORT="443"
# Base dir for installation and future updatesINSTALLDIR="/opt/xo"
# Script will update itself if there's a newer version available. This assumes that script inside a git directory and# remote is ronivay/XenOrchestraInstallerUpdater# options: true/falseSELFUPGRADE=true
# Xen Orchestra configuration file is stored in XOUSER's home directory ($HOME/.config/xo-server/config.toml) and# by default will be overwritten with every update done by this script.# You may disable this if you edit configuration by hand and don't want an update to overwrite it.# Note that some of the options defined here won't be applied even if changed if this is set to false.# options: true/false# no effect to Xen Orchestra proxyCONFIGUPDATE=true
# Location of Xen Orchestra repository where source code is fetchedREPOSITORY="https://github.com/vatesfr/xen-orchestra"
# Git branch, tag (append tags/ before the tag name) or individual commit where xen-orchestra sources are fetched.BRANCH="master"
# Installation log path# default: ./logs#LOGPATH=
# Only one PLUGINS variable can be used at a time. Comment out the other one if you change these below.# Comment out both if you don't want any plugins to be installed.
# Comma separated list of plugins to be installed, check README for more information. Note that 3rd party plugins# defined below should be listed here as well with their name eq. repo1,repo2 etc.#PLUGINS="xo-server-transport-email,xo-server-usage-report,xo-server-perf-alert"
# (default) all plugins will be installed, including possible 3rd-party plugins if defined.PLUGINS="all"
# Additional 3rd-party plugins to fetch. Keep the .git suffix.#ADDITIONAL_PLUGINS="https://github.com/user/repo.git,https://github.com/user/repo2.git"
# NodeJS and Yarn are automatically updated when running update/install. Can be disabled but not recommended# (installation might fail because of too old node.js or yarn)# Note that if nodejs is updated when script's update feature is used, it might not be possible to use rollback option# anymore without manually downgrading nodejs version to previous one# options: true/falseAUTOUPDATE="true"
# enable/disable OS check. Installation refuses to run on any other than supported OS versions if this is enabled.# Can be disabled for experimental purposes.# options: true/falseOS_CHECK="true"
# enable/disable architecture check. Installation refuses to run on any other than x86_64 if enabled.# Can be disabled for experimental purposes.# options: true/falseARCH_CHECK="true"
# Define the number of previous successful installations you want to keep. Needs to be at least 1.# Determines how far the rollback feature can be used.PRESERVE="3"
# certificate settings have no effect to Xen Orchestra proxy, it'll generate it's own self-signed certificates always
# Location of pem certificate/key files. Installation will automatically configure HTTPS if these are defined.# Remember to change PORT variable as well.PATH_TO_HTTPS_CERT=$INSTALLDIR/xo.crtPATH_TO_HTTPS_KEY=$INSTALLDIR/xo.key
# location of CA certificate file.# define this if your host certificate is issued by a custom CA and you want XO to trust it.# file can contain multiple certificates#PATH_TO_HOST_CA=
# If set to true together with cert/key paths, defined pem key/certificate will be created if neither exists.# options: true/falseAUTOCERT="true"
# If set to true, this will install the rpm/deb repositories necessary for the Xen Orchestra install.# If set to false, these repositories will not be installed. Also automatic nodejs upgrade will be disabled.# Note that installation will fail if all needed packages aren't available from configured repositories.# See README for list of packages.# options: true/false# default: true#INSTALL_REPOS="true"
Cleanup
Section titled “Cleanup”This step is only needed if you followed the Quick Deploy method first and then followed the XOA (From source) method.
Navigate to 🏠Home > 🖥️VMs
- Click
XOA(The one with description ofXen Orchestra virtual Appliance) - Click
Advanced - Click Force shutdown
- Click Remove