Configuration
Get GeoLite2 DB Key
Section titled “Get GeoLite2 DB Key”- Navigate to MaxMind’s website
- Register/Login
- Navigate to
Manage License Keys - Click Generate new license key
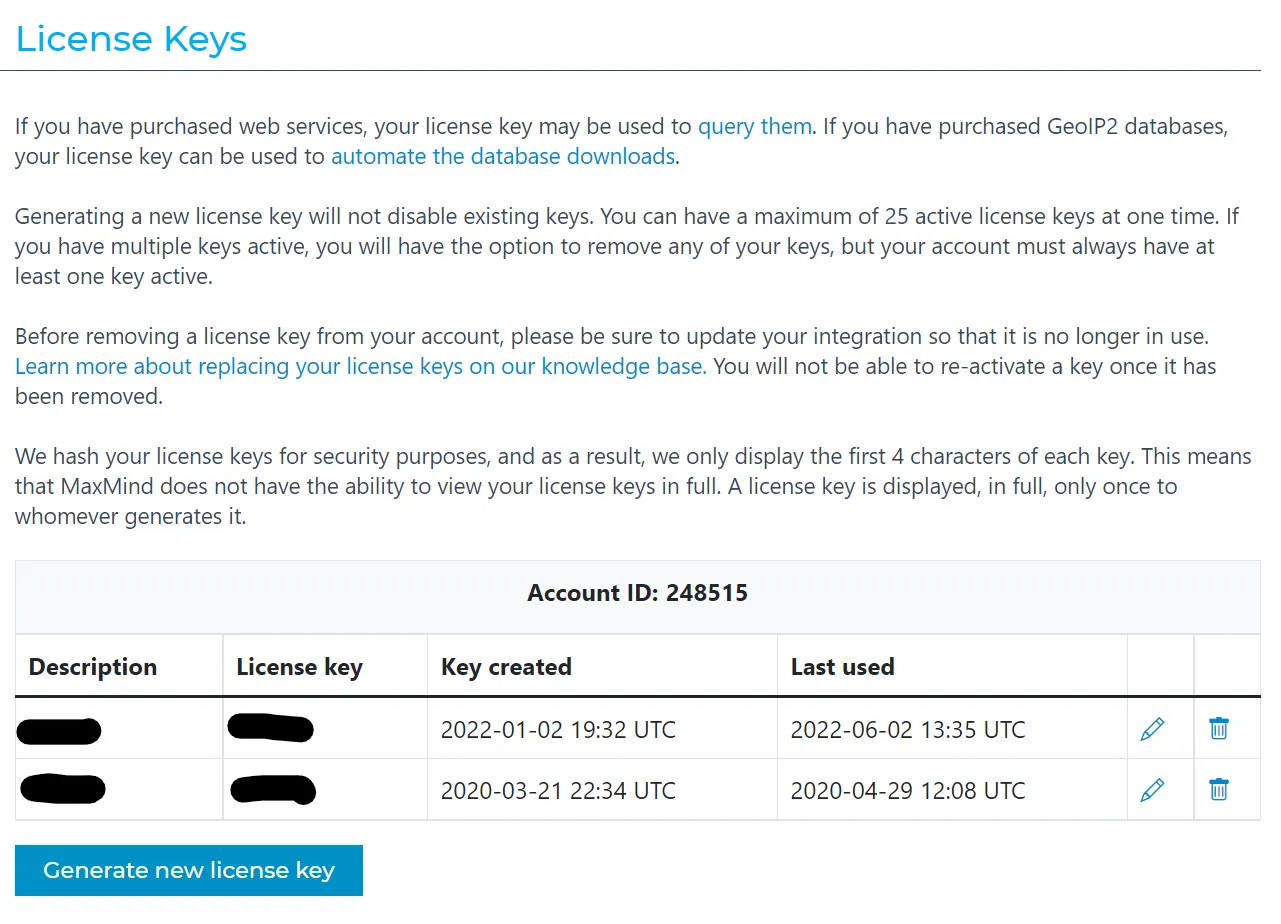
- Enter a Name
- Select
YesonWill this key be used for GeoIP Update - Select
Generate a license key and config file for use with geoipupdate version 3.1.1 or newer.
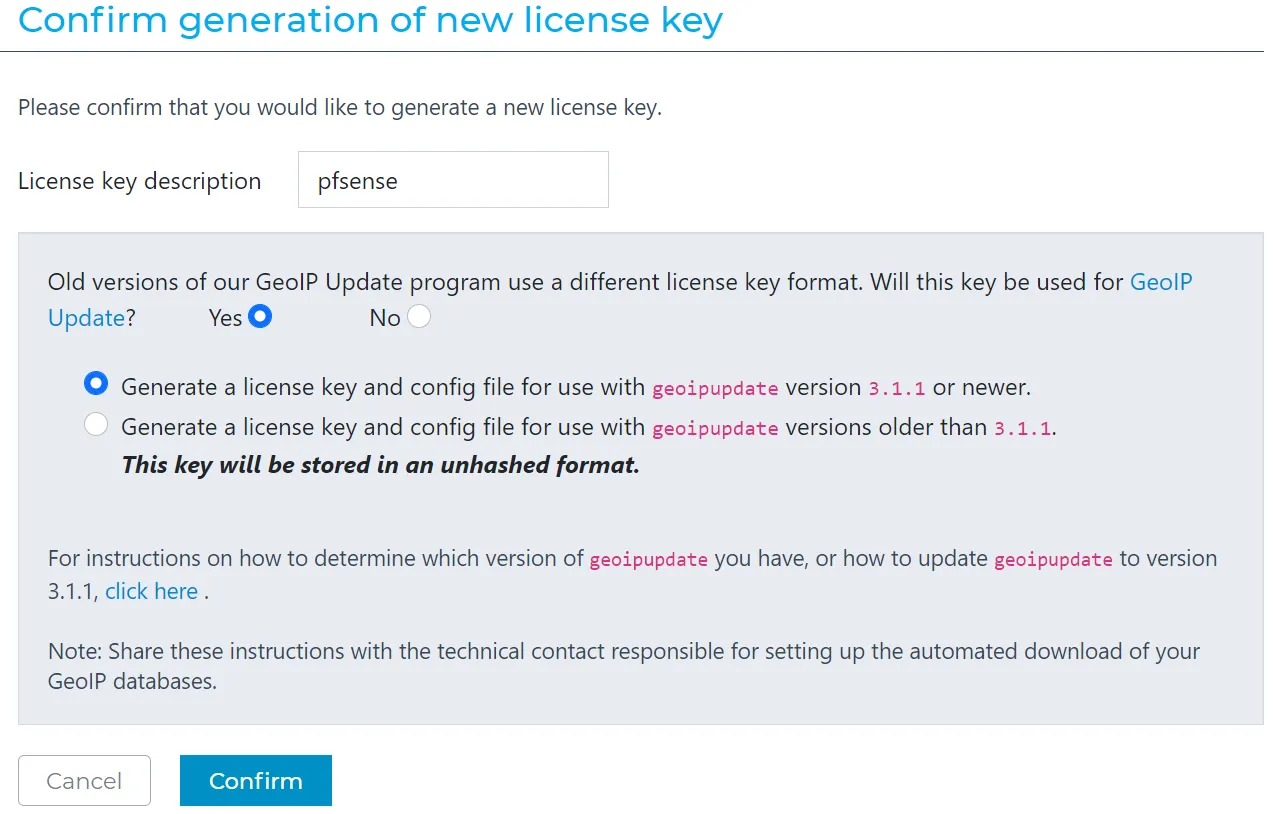
- Click Confirm
- Copy and store
License keyfor later use
Enable ntopng
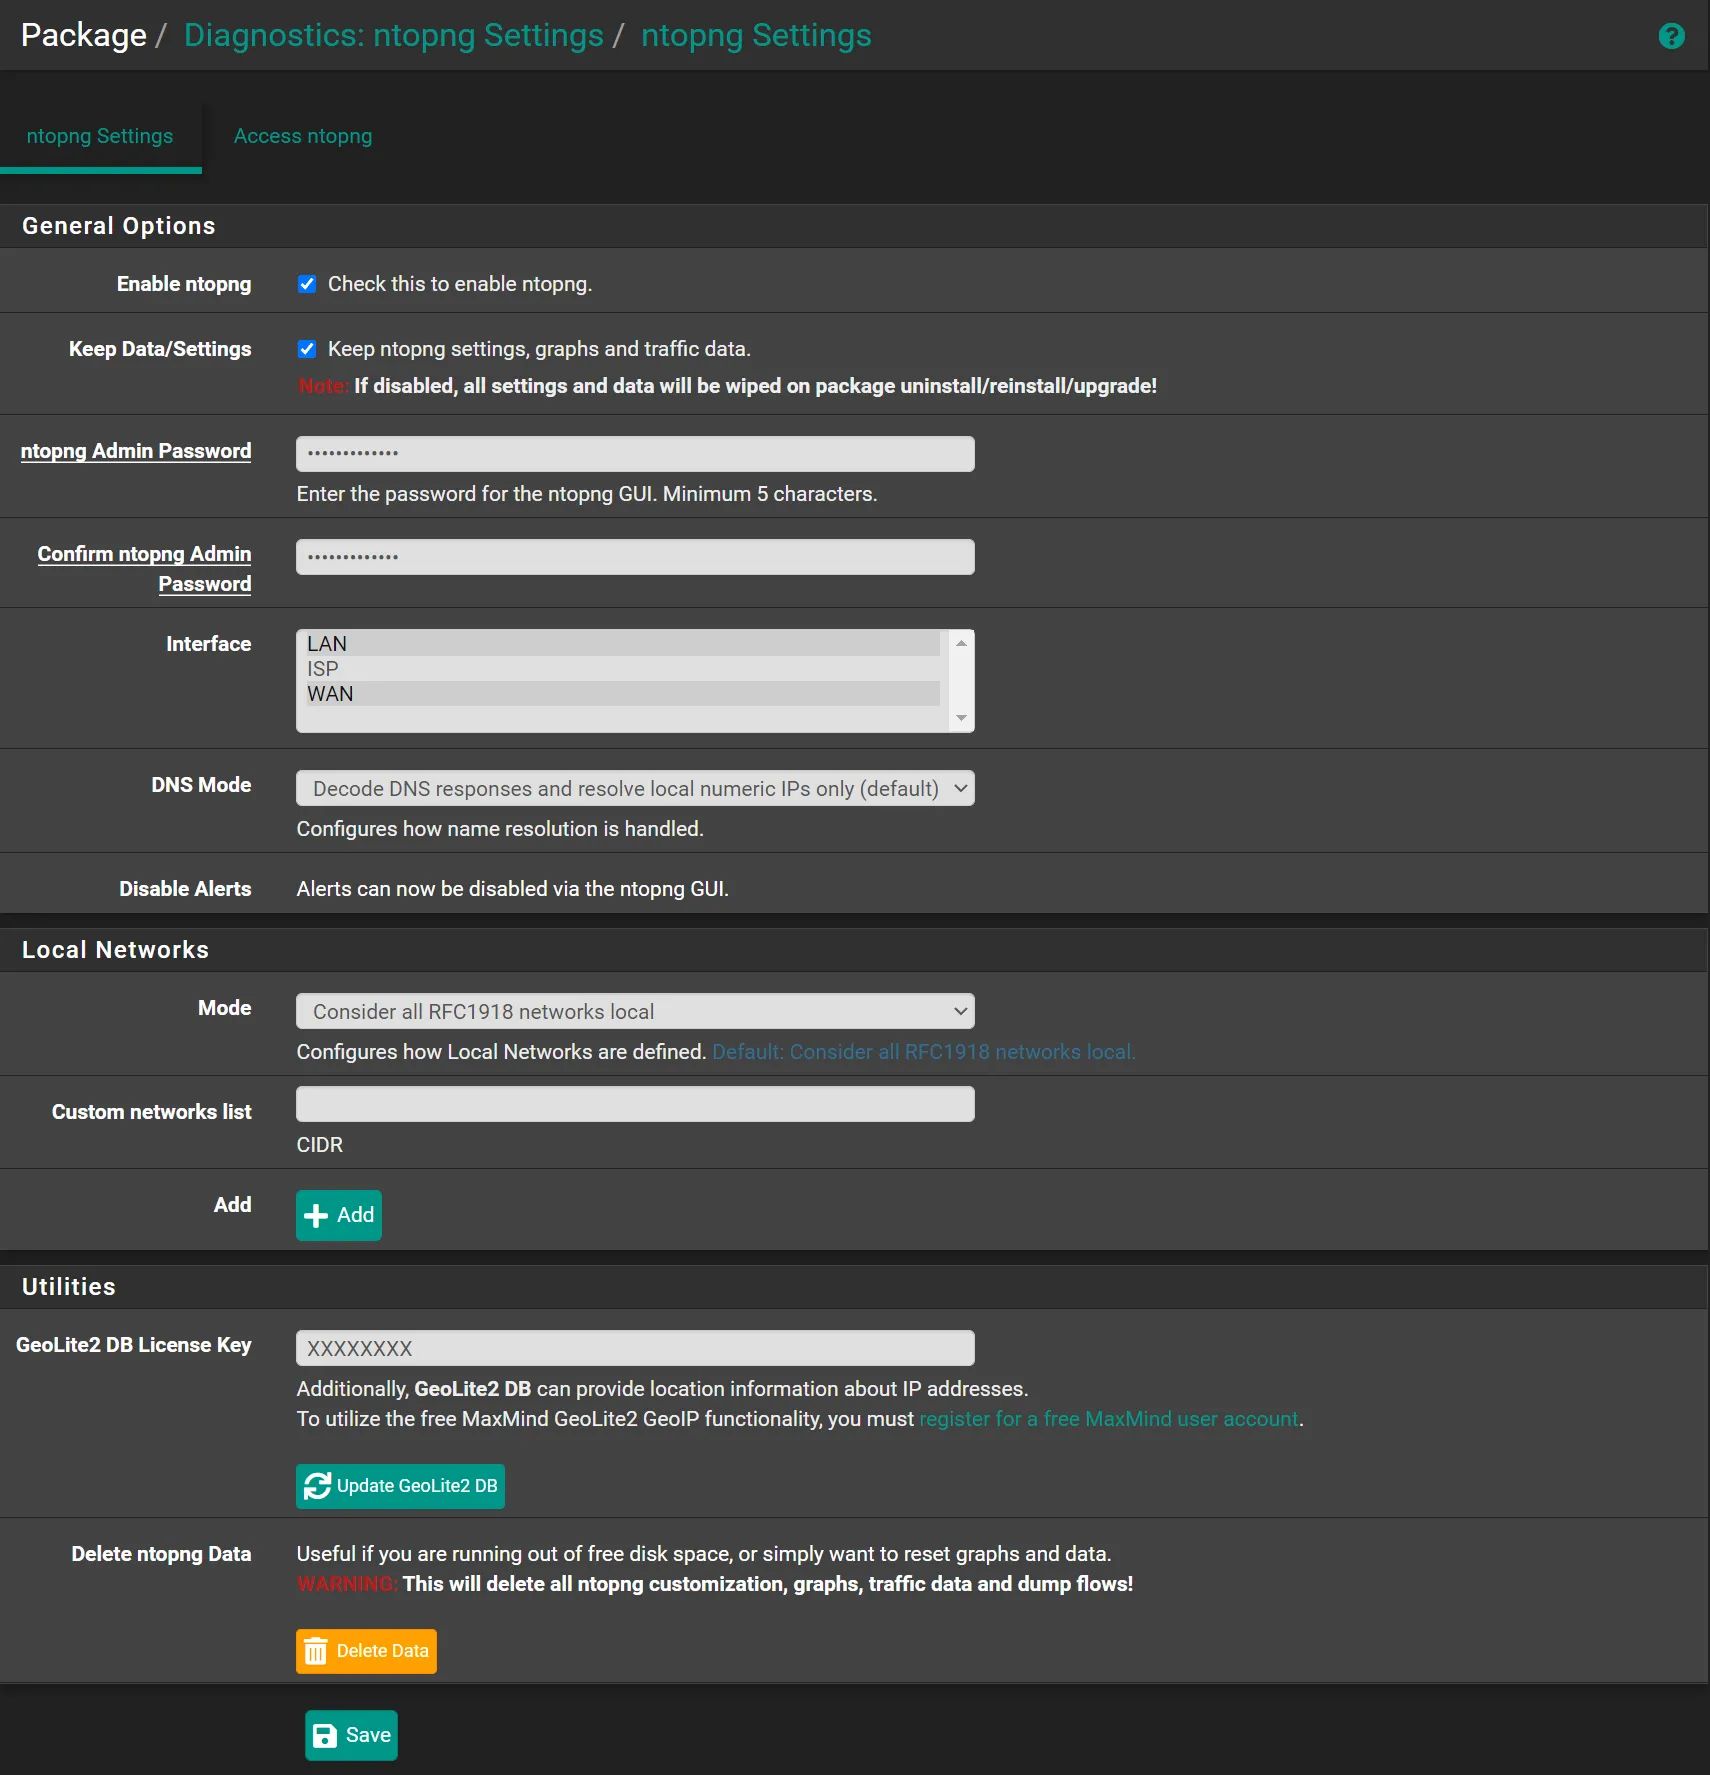
Section titled “Enable ntopng”Navigate to Diagnostics -> ntopng Settings
- Check
Enable ntopng - Set
ntopng Admin Password - Set
Confirm ntopng Admin Password - Select
Interface(s) you want to monitor - Optionally, enter
GeoLite2 DB License Key - Click 💾Save
Configure ntopng
Section titled “Configure ntopng”Navigate to Diagnostics -> ntopng
Username: admin
Password: the-password-you-set-before
- Navigate to top right corner, click on the human icon
- Toggle Dark Theme
- Click
Settings->Preferenceson the left sidebar- Click
Expert View - Click
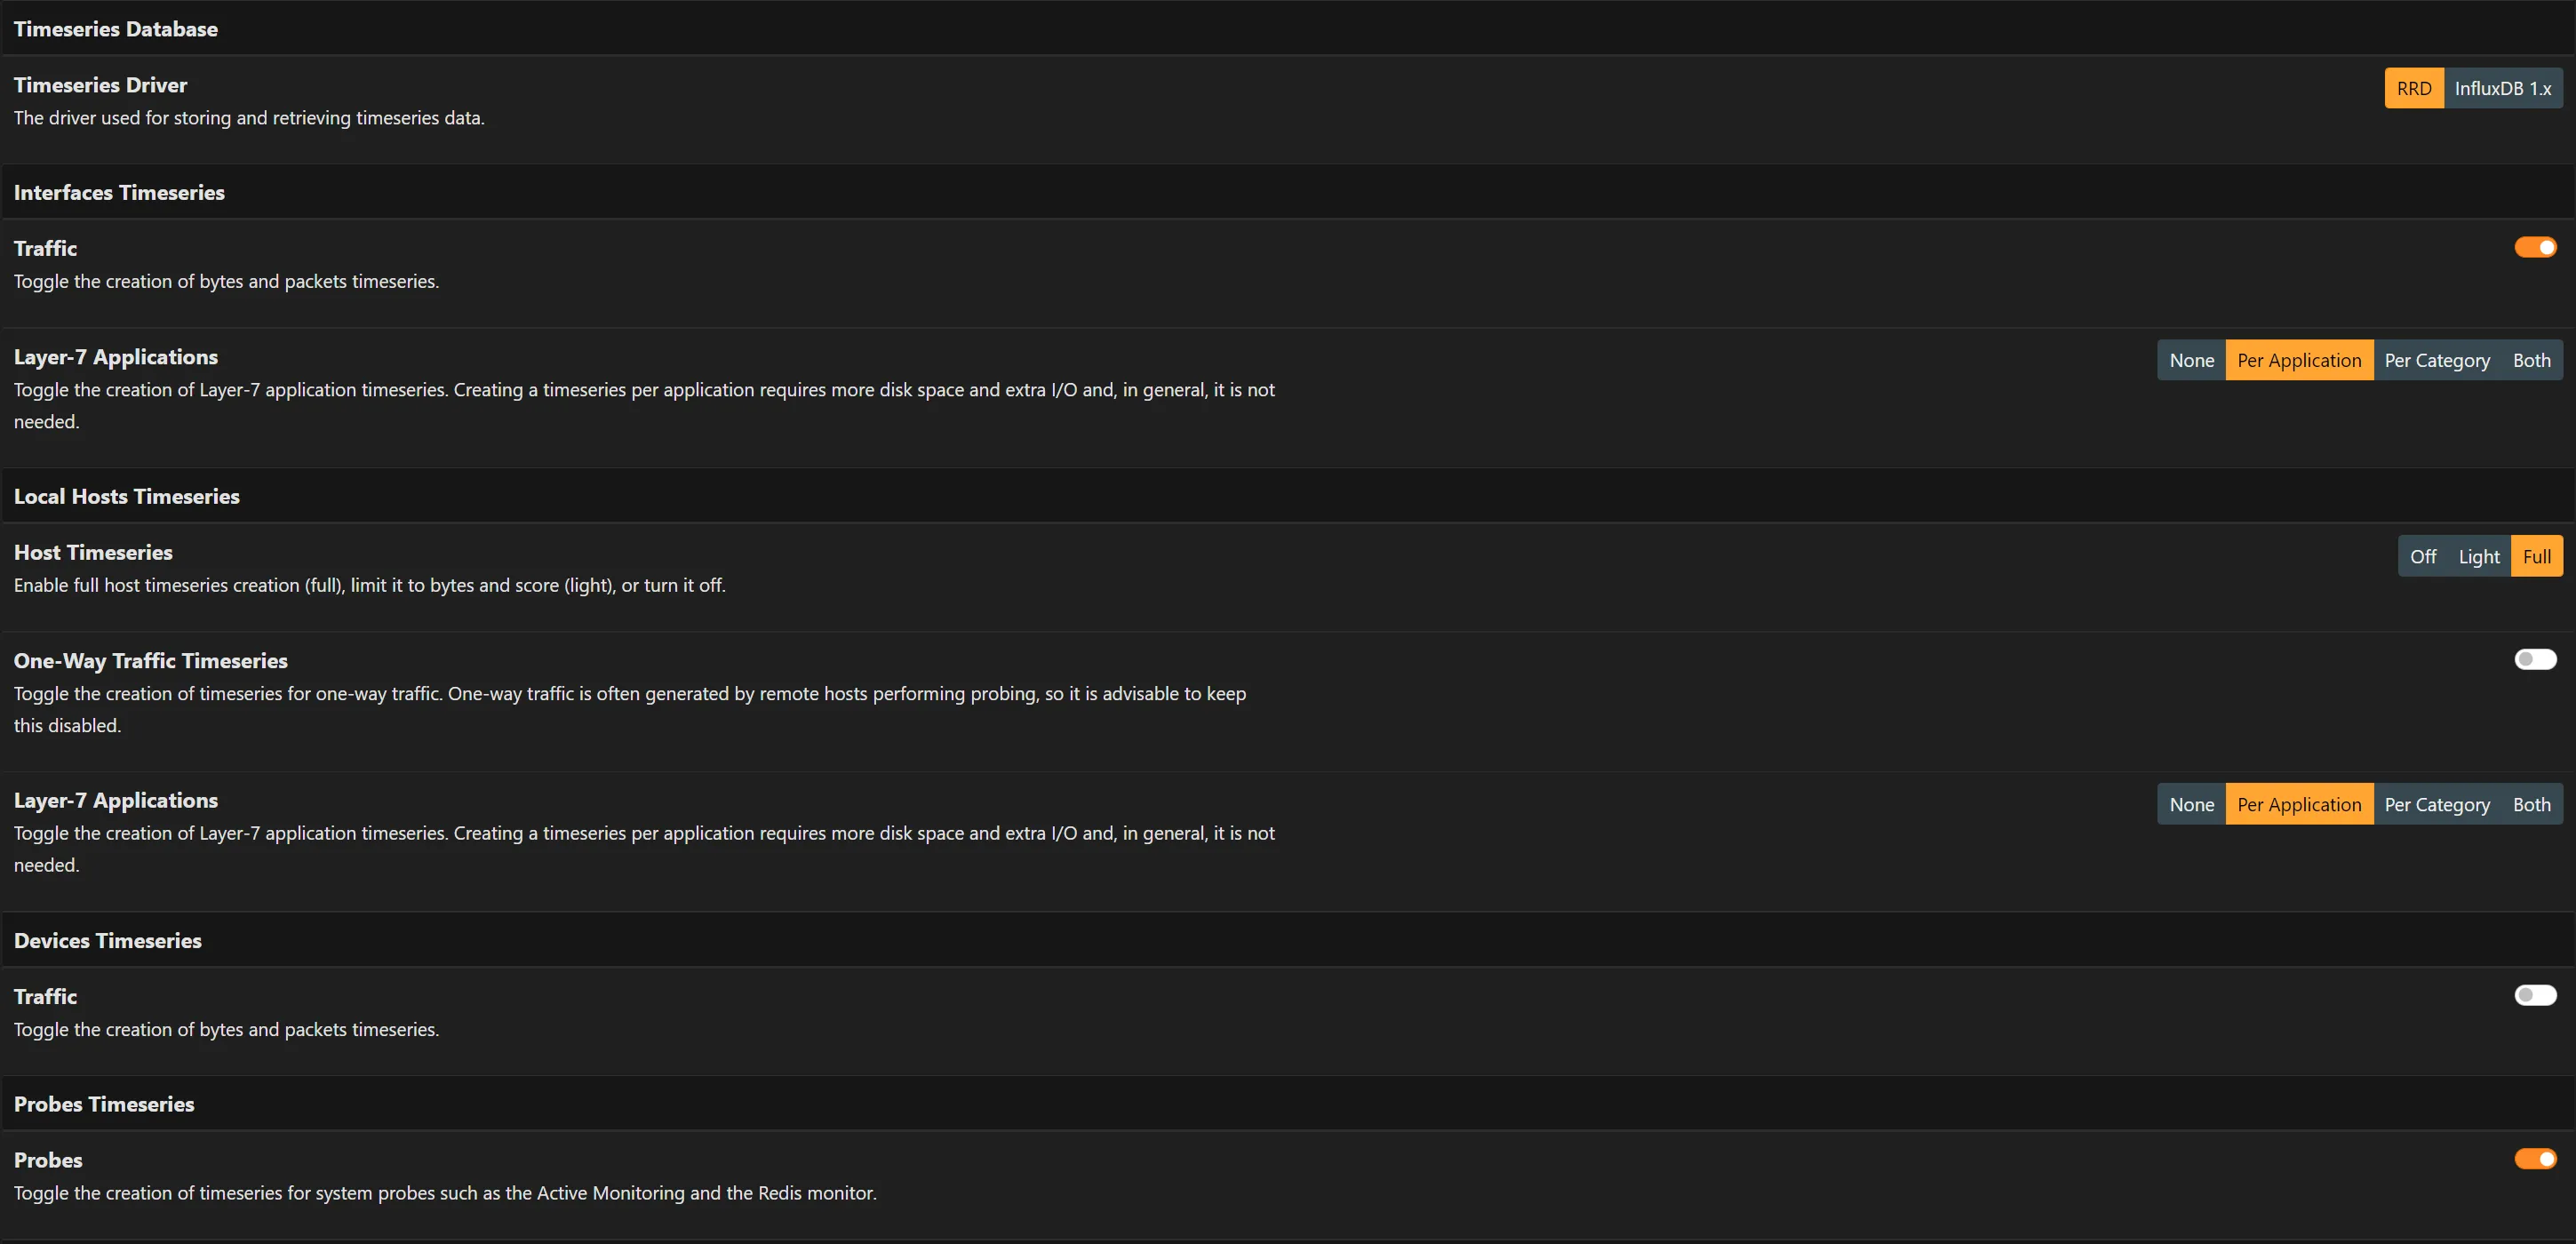
Timeseries- Set
Layer-7 ApplicationstoApplications - Set
Host TimeseriestoFull - Set
Layer-7 ApplicationstoApplications - Toggle
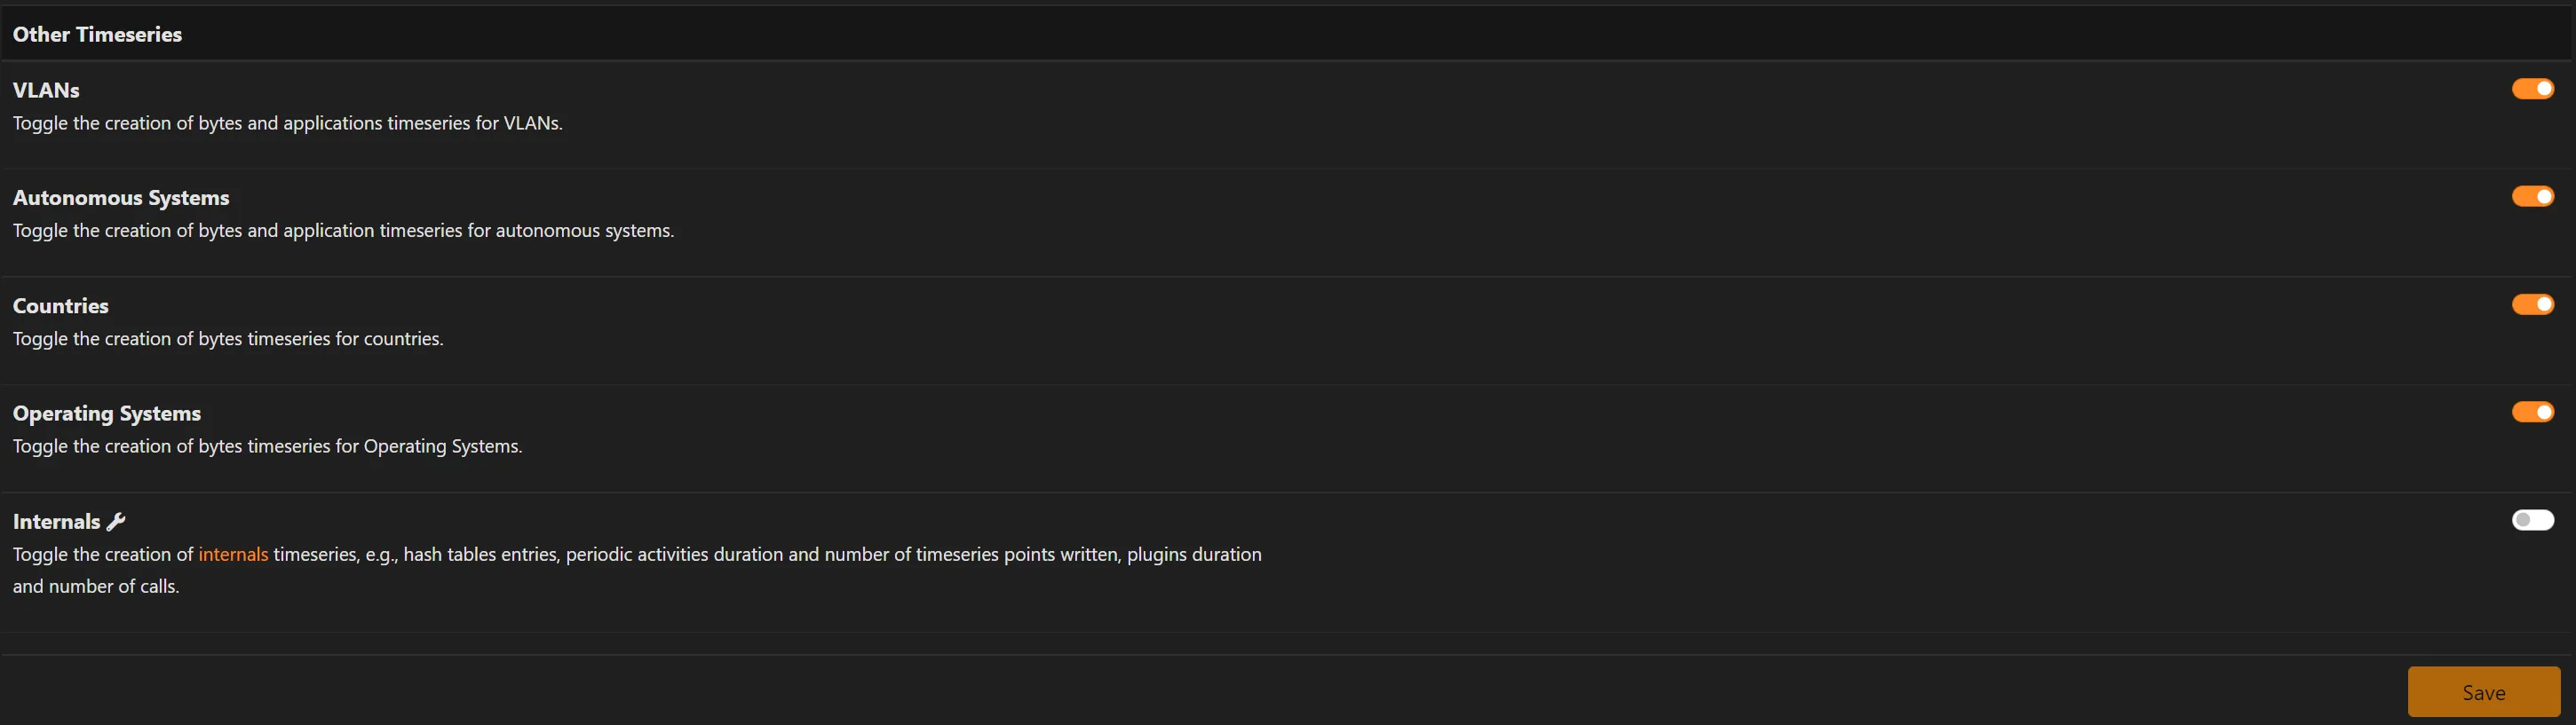
VLANstoON - Toggle
Autonomous SystemstoON - Toggle
CountriestoON - Toggle
Operating SystemstoON - Click Save
- Set
- Click
- Click
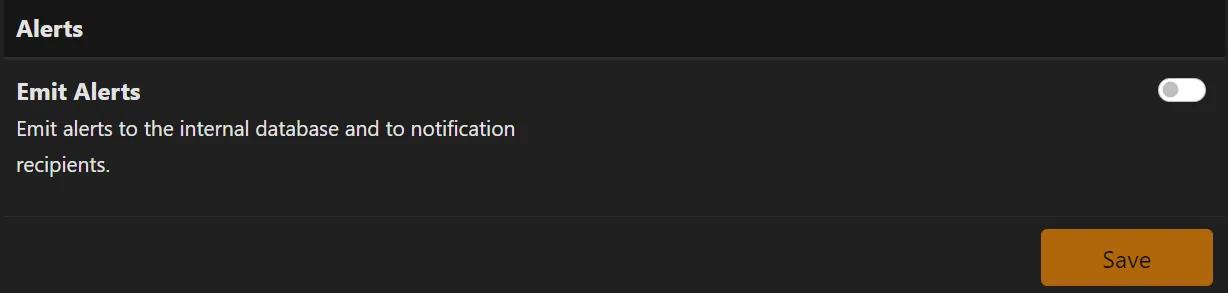
Alerts- Toggle
Emit AlertstoOFF - Click Save
- Toggle
- Click
Telemetry- Click
Do not contribute - Click Save
- Click

- Click
Data Retention- Set to
120Days - Click Save
- Set to

For every non-WAN interface, navigate to Interface on the left sidebar
(You can change interface on the top left corner)
- Click the ⚙️Gear
- Set
Local Broadcast Domain Hosts IdentifiertoMAC Address - Click Save Settings

- Click the ⚡Lightning
- Click the ➕
- Enter the first DCHP IP of the interface you are configuring now
- Enter the last DCHP IP of the interface you are configuring now
- Click Save Settings

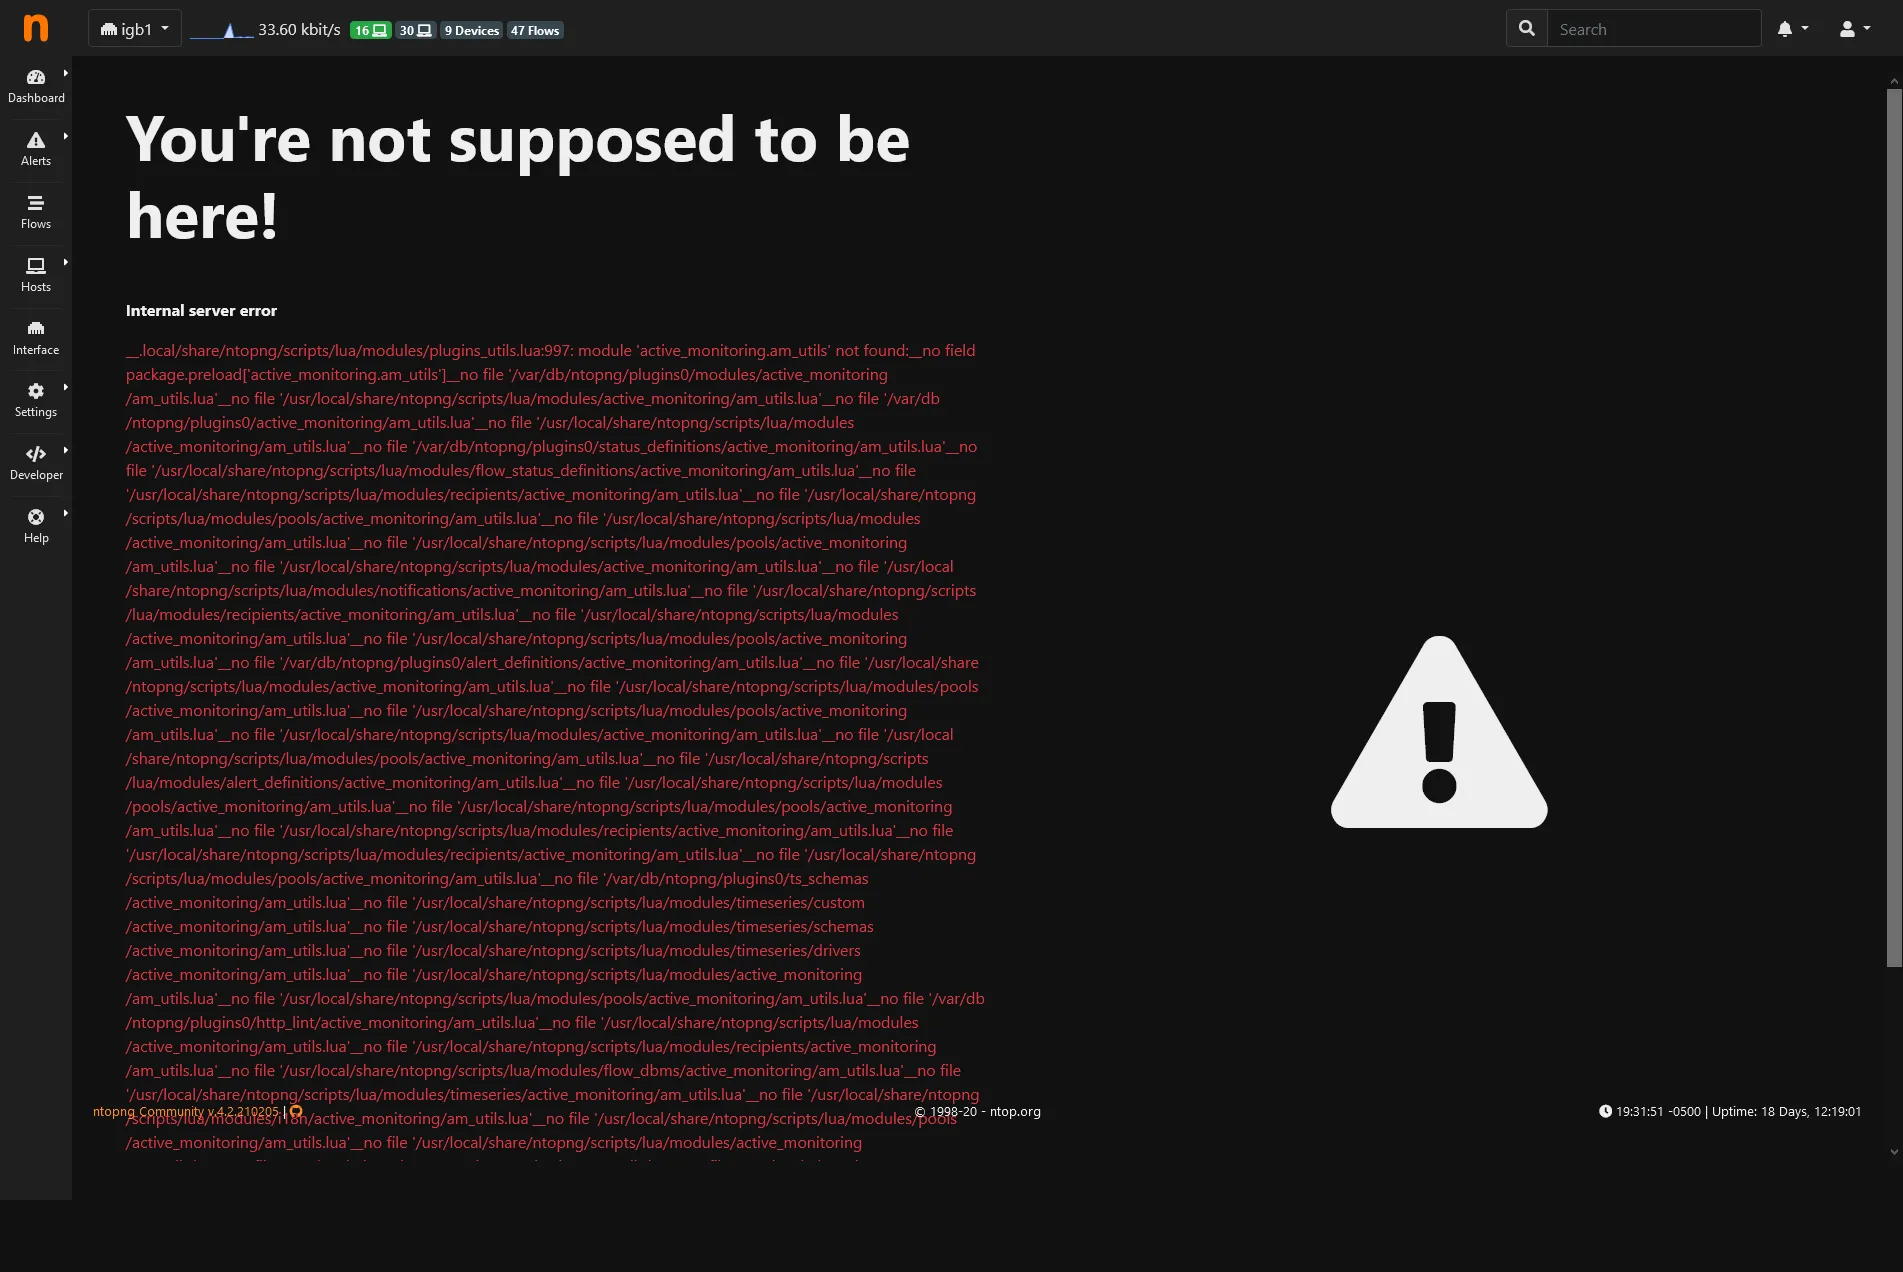
If you get an error like below, simply restart the ntopng service.