Configuration
Create account keys
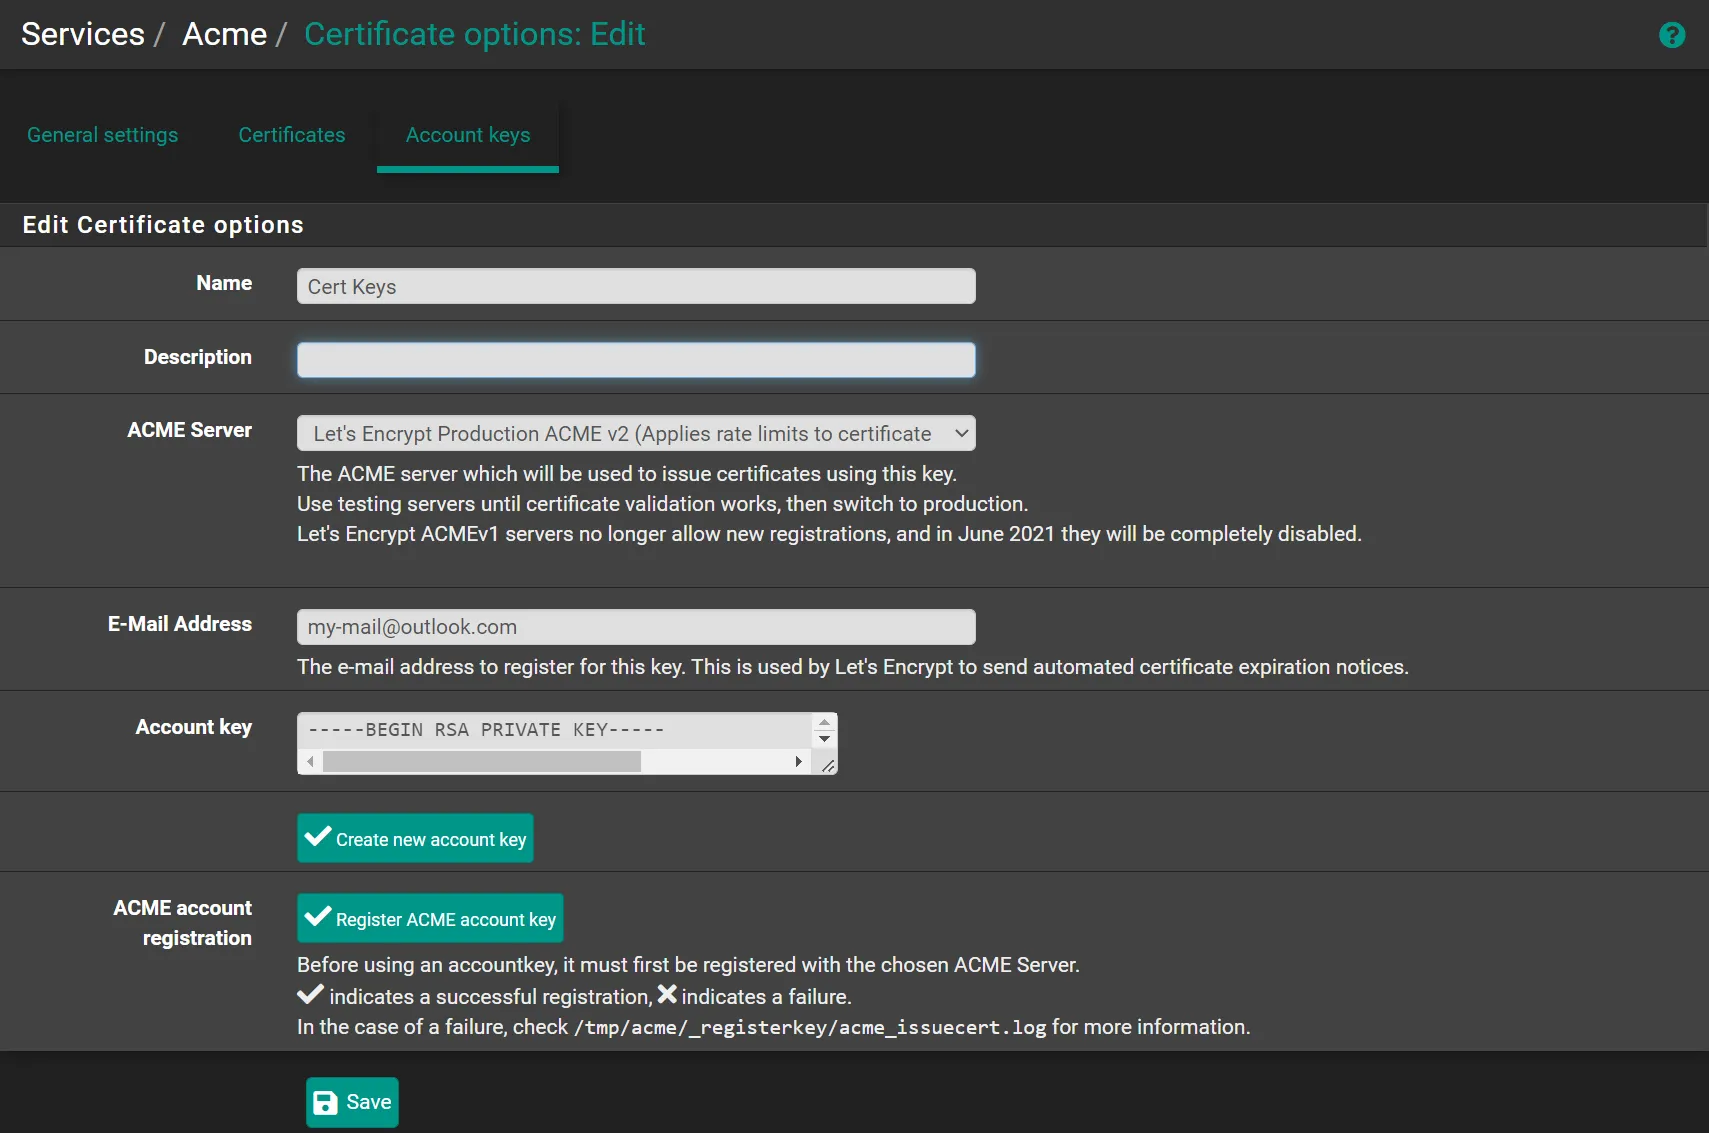
Section titled “Create account keys”Navigate to Sevices -> Acme Certificates -> Account keys
- Click ➕Add
- Name:
Cert Keys - ACME Server:
Let's Encrypt Production ACME v2 - E-Mail Address:
my-mail@outlook.com - Click ➕Create new account key
- Click ➕Register ACME account key
- Click 💾Save
Create certificate
Section titled “Create certificate”Navigate to Sevices -> Acme Certificates -> Certificates
Zone ID:
- Navigate to your Cloudflare account
- Select your domain.
- Scroll down to
API
Account ID:
- Navigate to your Cloudflare account
- Select your domain.
- Scroll down to
APIon the right sidebar
Token: (You can use the API Token you created for Dynamic DNS)
- Navigate to your Cloudflare account
- Click on the top right corner.
- Click
My Profile - Click
API Tokenson the left sidebar - Click Create Token
- Click Use template on `Edit zone DNS
- Permissions:
Zone-DNS- `Edit
- Zone Resources
Include-Specific zone-your-domain.com
- Permissions:
- Click Continue to summary
- Click Create Token
Key:
-
Navigate to your Cloudflare account
-
Click on the top right corner.
-
Click
My Profile -
Click
API Tokenson the left sidebar -
Click View on
Global API Key -
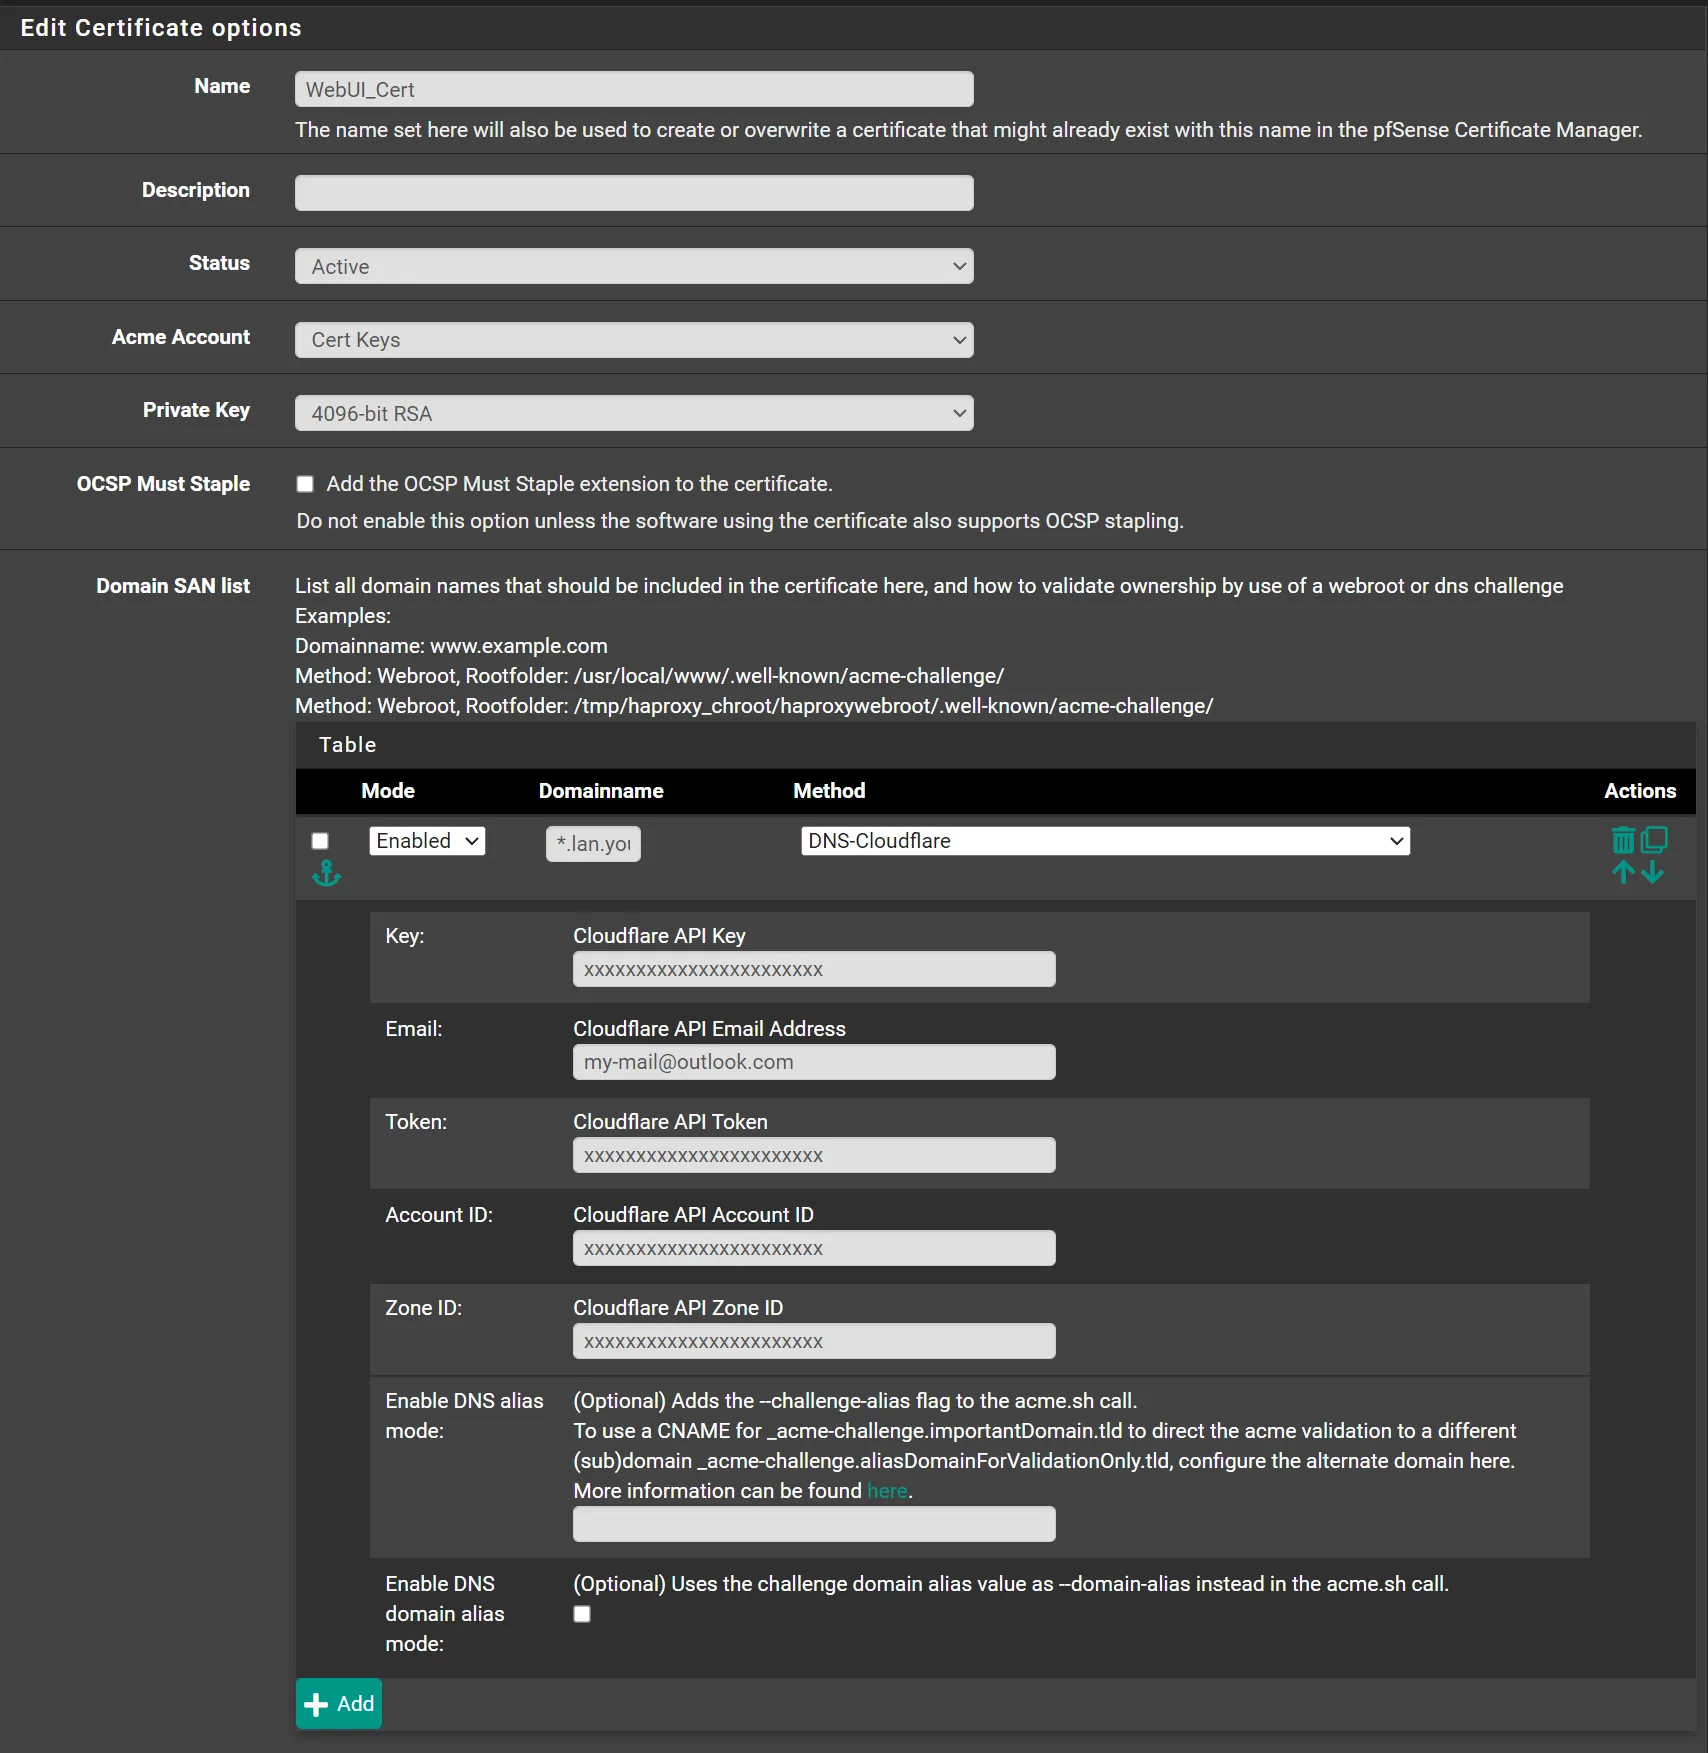
Click ➕Add
-
Name:
WebUI_Cert -
Status:
Active -
Acme Account:
Cert Keys -
Private Key:
4096-bit RSA -
Domain SAN list:
- Domainname:
*.lan.your-domain.com - Method:
DNS-Cloudflare- Key:
Global API Key - Email:
my-mail@outlook.com - Token:
API Token - Account ID:
Account ID - Zone ID:
Zone ID
- Key:
- Domainname:
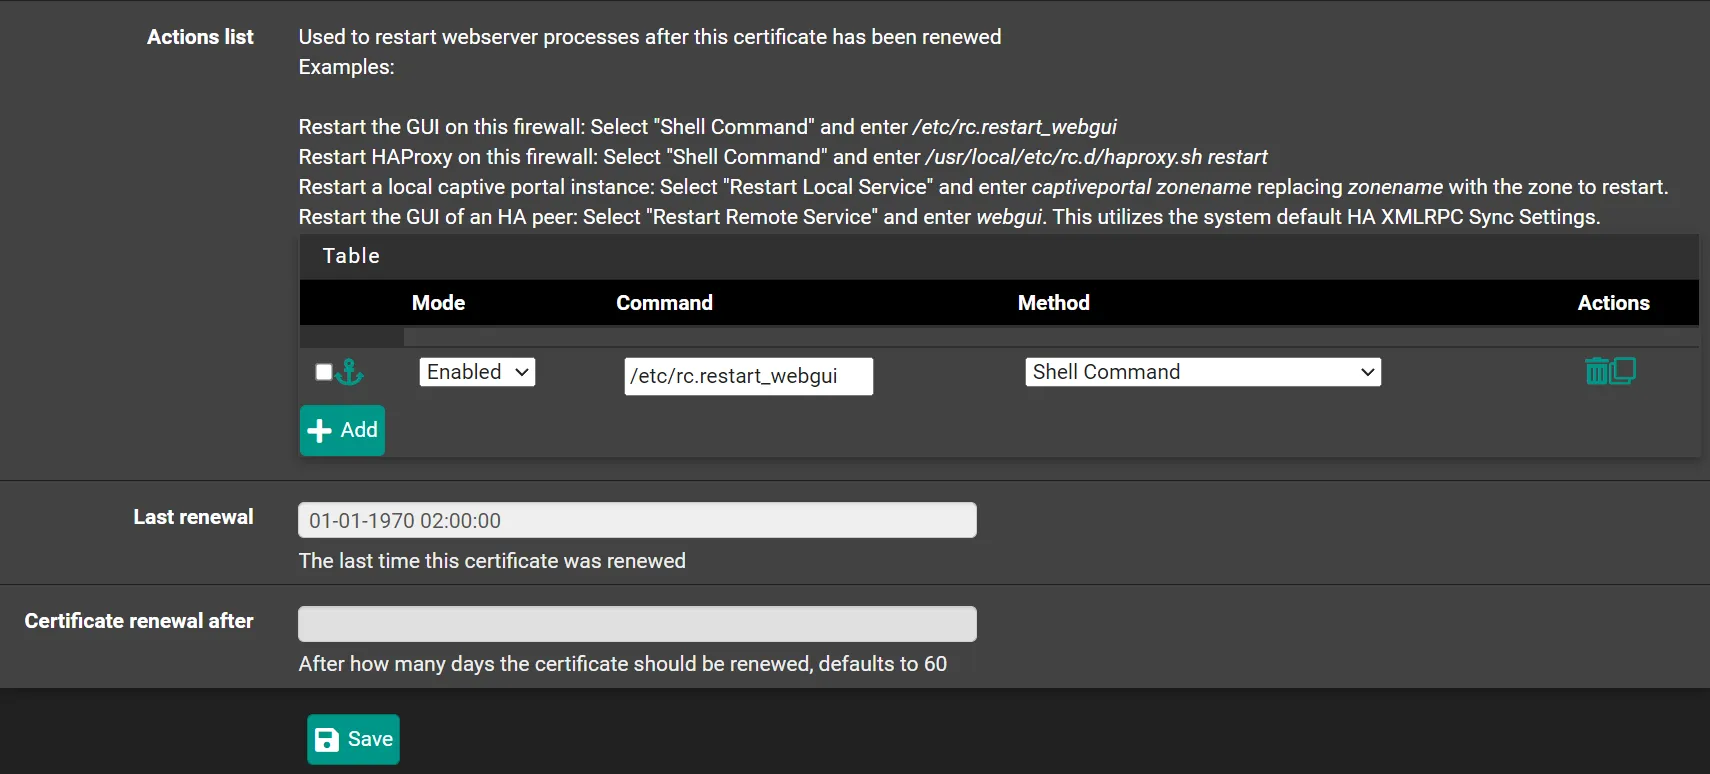
- Actions list:
- Click ➕Add
- Mode:
Enabled - Command:
/etc/rc.restart_webgui - Method:
Shell Command
- Click 💾Save
- Click ✔️Issue/Renew
If you see a green message after some seconds, it means certificate issuance succeeded.
Use the certificate
Section titled “Use the certificate”Navitagate to System -> Advanced -> `Admin Access
- SSL/TLS Certificate:
WebUI_Cert - Alternate Hostnames:
FQND of your firewall(eg. fw.lan.your-domain.com) - Click 💾Save

